How Do I Schedule a Query?
Introduction
Note: Your screen may look different from the screenshots in this article.
In the my.SDSU portal, staff with specific roles will be able to schedule reports, which are called Queries in my.SDSU. For example, you may want to run the Course Demand Report to track specific demand for your courses during registration. This guide will take you through the process of scheduling any Query.
Instructions
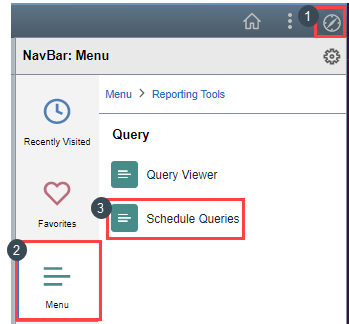
- On the my.SDSU homepage at the top right of the page, select the NavBar icon.
 Then select Menu > Reporting Tools > Query > and select Schedule Queries.
- At the top left of the page, select:
a. Find an Existing Value.
b. Search to find an existing Run Control ID.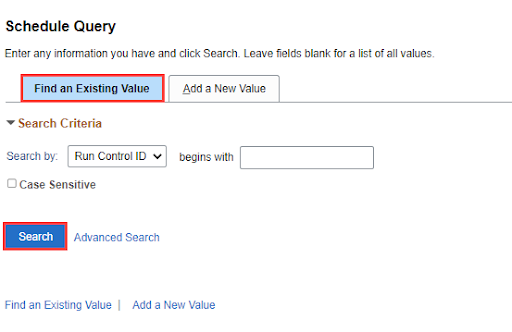
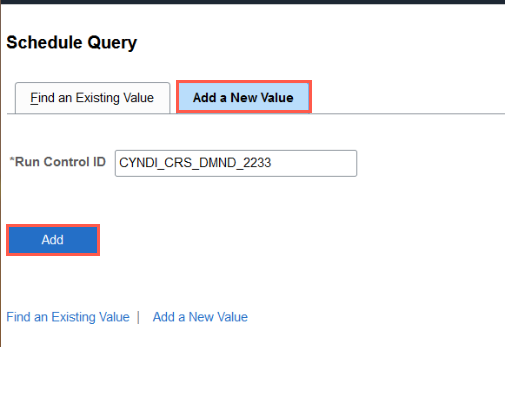
You can also select Add a New Value and enter a new Run Control ID in the textbox, such as the ID for the Course Demand Report, and select Add.
- On the top left of the page:
a. Input the Query Type and Query.
b. Select Search. A list of results will appear below your search.
c. Select the Query name you would like to run.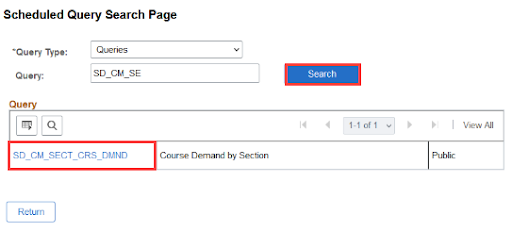
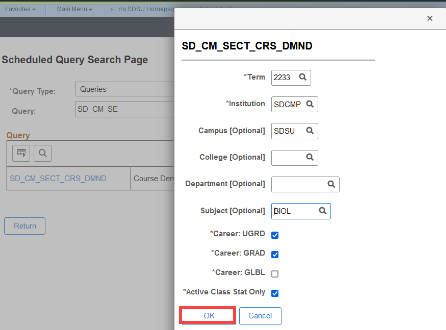
- A pop-up window will appear where you can enter additional information related to your query. Once you complete the required fields marked with a asterisk * and any desired Optional fields, select OK at the bottom of the page.
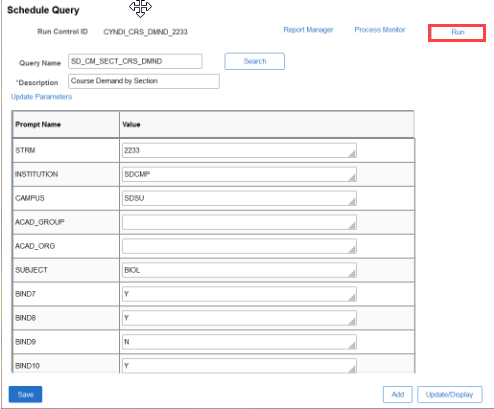
- Review your selections. You can make changes here if needed. Once everything looks accurate, select Run on the top right of the page.
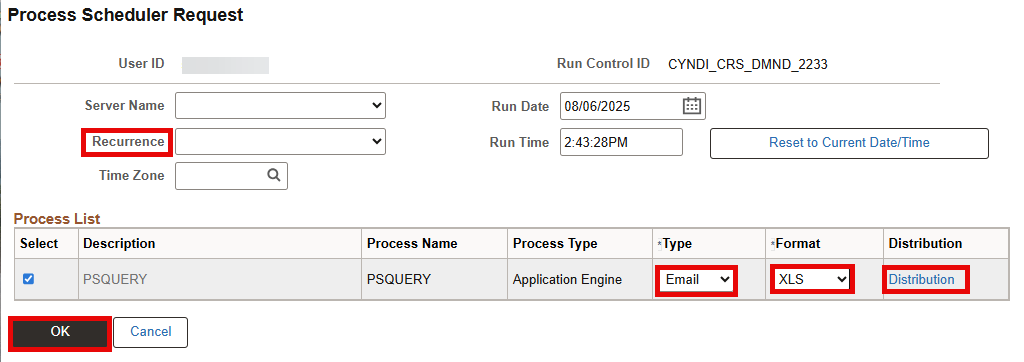
- Select your Query Type and Format from the drop down menus. You can use Recurrence to set the Query to run on a schedule including Monthly, Weekly and Daily options. Use the Distribution link if you would like to email copies of the Query to additional recipients. Once you are finished, select OK.
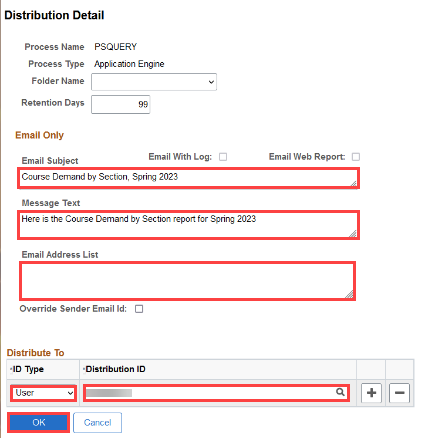
- Optional: If you select the Distribution link to send your Query to additional recipients, you will be taken to the Distribution Detail page.
Complete the Email Subject, Message Text, and Email Address List fields. You can also designate roles to Additional recipients under Distribute To. Once you are finished, select OK to return to the Process Scheduler Request page.
Once you select OK on the Process Scheduler Request page, your Query is complete.
If you selected email XLS, you should have a spreadsheet emailed to you shortly.
Note: Others may be using the Query Scheduler. If you scheduled the Query to be delivered immediately, your request will be added to the queue and may take a few minutes to run depending on overall usage.
