
How Do I Manage Service Indicators?
Introduction
Note: Your screen may look different from the screenshots in this article.
Service indicators have positive or negative impacts on student files and records. Service indicators may be accessed via the Student Service Center.
Negative service indicators are indicated by a circle with a diagonal slash and mean that the student has something that must be addressed/rectified (i.e., financial aid has placed a “hold” which prevents aid from being dispersed). This icon may also indicate a transcript hold or denied registration of classes.
Positive service indicators are indicated by red stars that designate special services students are entitled to receive. Positive service indicators do not have impact values but may be used as criteria when providing some services.
Instructions
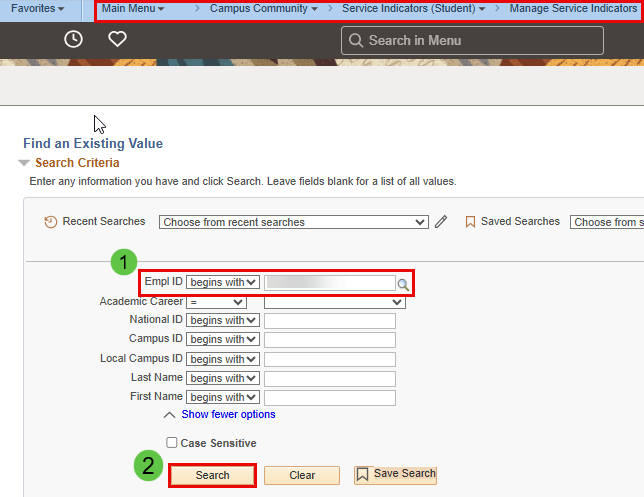
- Navigate to the Campus Community > Service Indicators (Students) > Manage Service Indicators page. Enter the student's EMPLID and Search.
-
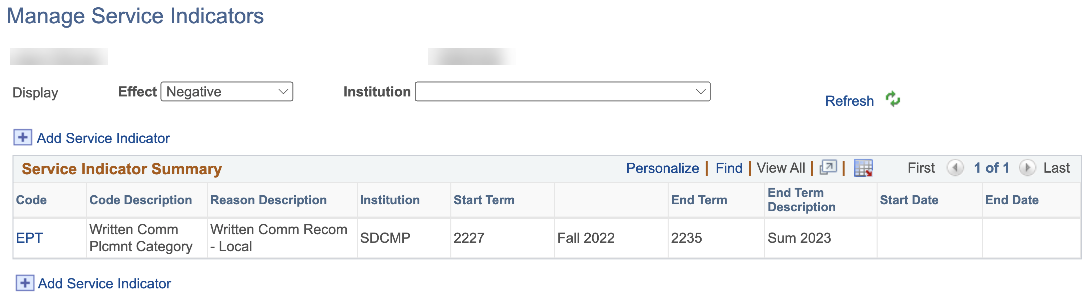
The Manage Service Indicators page will display and list the student's indicators by effect.
-
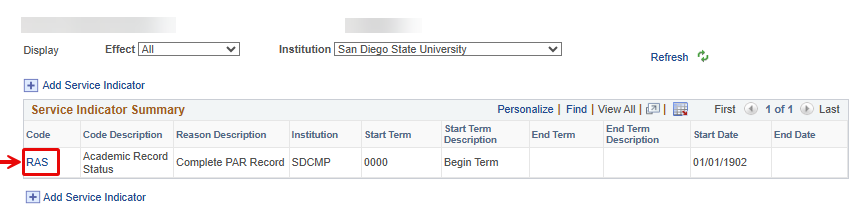
To gather additional information about a specific service indicator, select the column code in the Service Indicator Summary section.
-
On the View Service Indicator page, you can view details and requirements of the indicator, when it starts/ends, and who assigned it. Depending on your level of access, you may be able to release the service indicator if the student satisfied the requirement.
Assigning a Service Indicator
- Navigate to the Campus Community > Service Indicators (Student) > Manage Service Indicagtor's page. Enter the student's EMPLID and Search.
- Click on either of the ( + ) icons to Add a Service Indicator as shown in the image below:

- This brings up a new student indicator row page. Enter details for the following fields:

- Service Indicator Code. Click on the spy/search icon to select one.
- Reason Code
- Start Term, End Term
- Contact Information
- Select OK to Save the details.
Note: You will only see Service Indicator codes and Reason codes that you have access to.
- The added service indicator details are now displayed in the Service Indicator Summary.

Releasing a Service Indicator
- Navigate to the Campus Community > Service Indicators (Student) > Manage Service Indicators page. Enter the student's EMPLID and Search.
- This page lists all the rows of service indicators associated with the student's ID. Select the link for the service indicator that needs to be released.
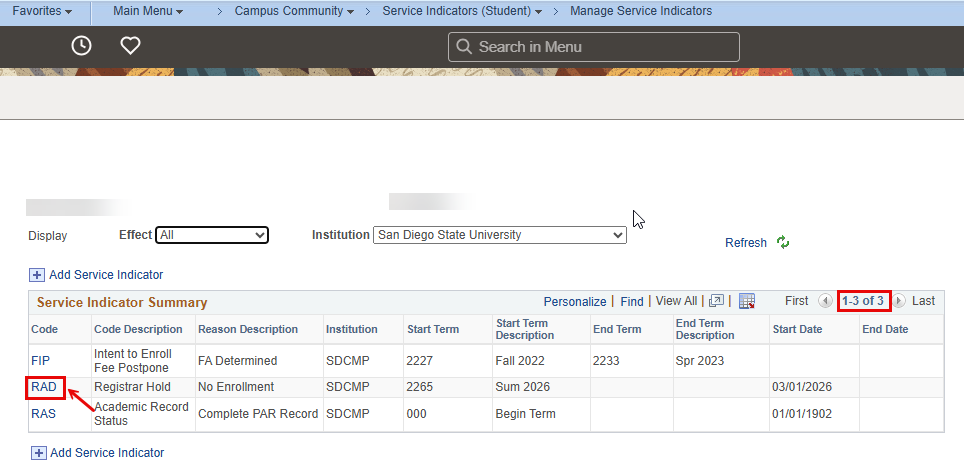
- On the Service Indicator page, select the 'Release' icon.
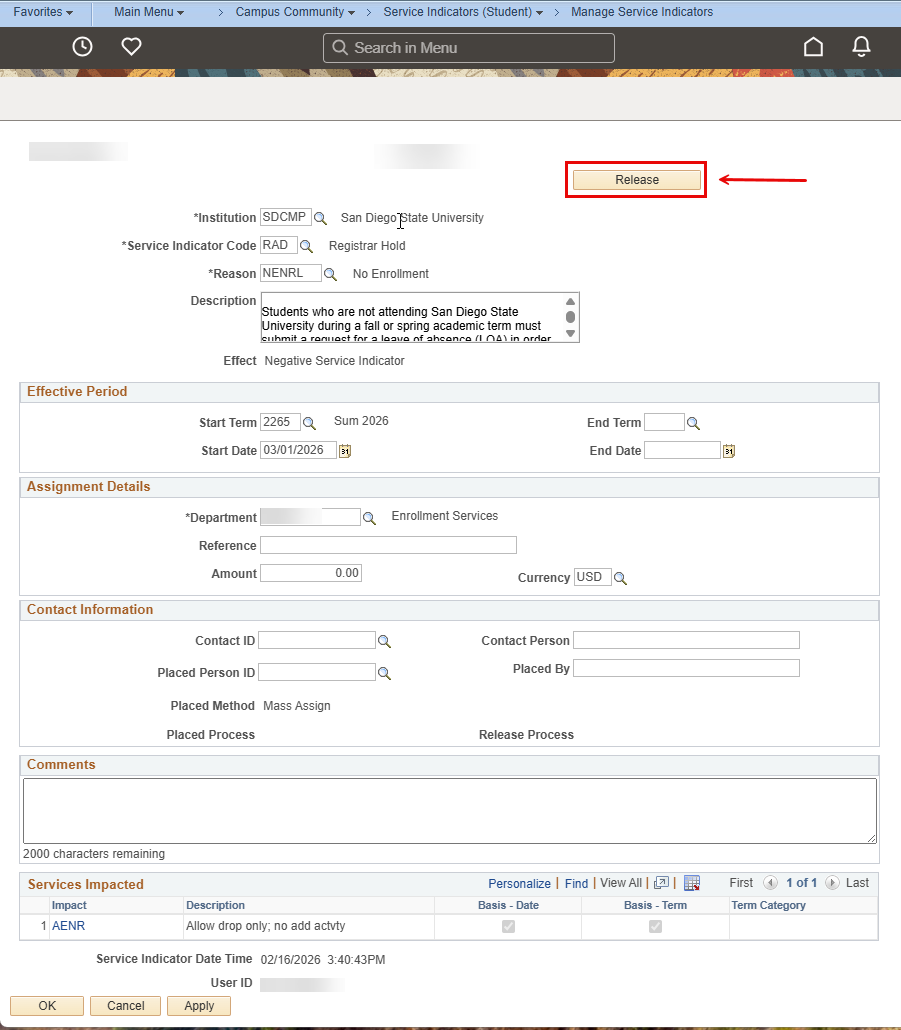
- Next - click 'OK' to confirm the release of the selected service indicator.

- This action brings up the updated Service Indicator Summary page for the student.
