How Do I Complete the Student Information Update Task?

Introduction
Note: Your screen may look different from the screenshots in this article.
Each semester, students are prompted to confirm and update their personal information, emergency contacts, and student privacy information through their Tasks tile. This guide will take you through completing the Student Information Update task.
Instructions
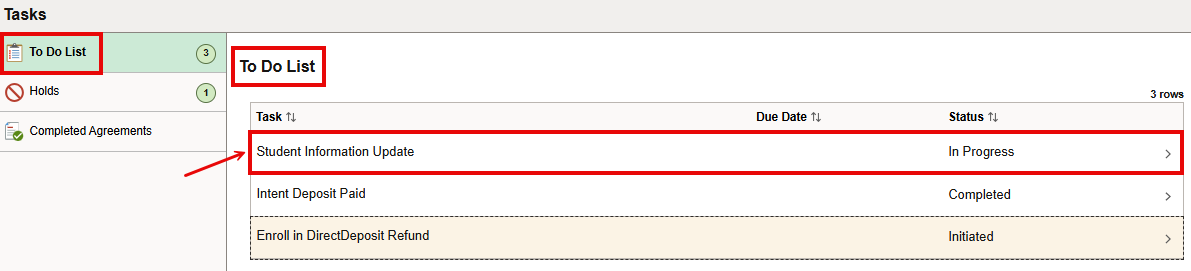
- On the my.SDSU Homepage, the Student Information Update will present as a To Do in the Tasks tile. Select the Tasks tile to continue.

- Pending tasks will appear on a To Do list. Select the Student Information Update bar.
-
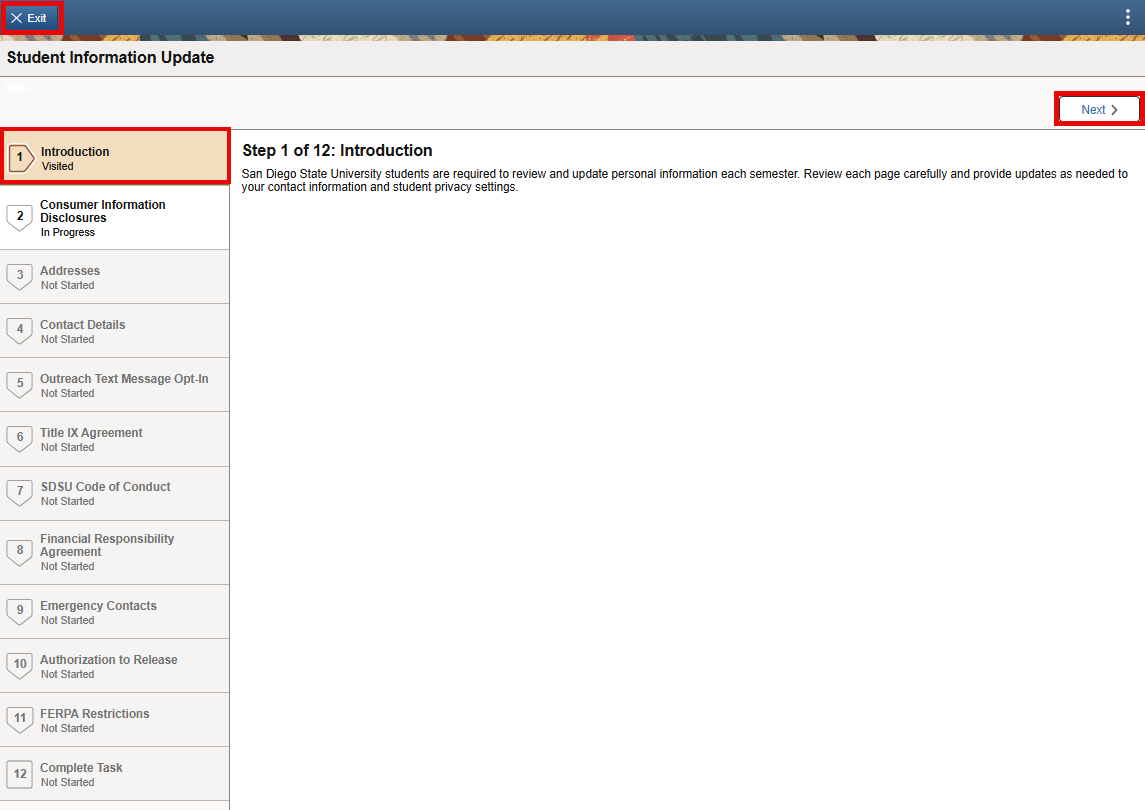
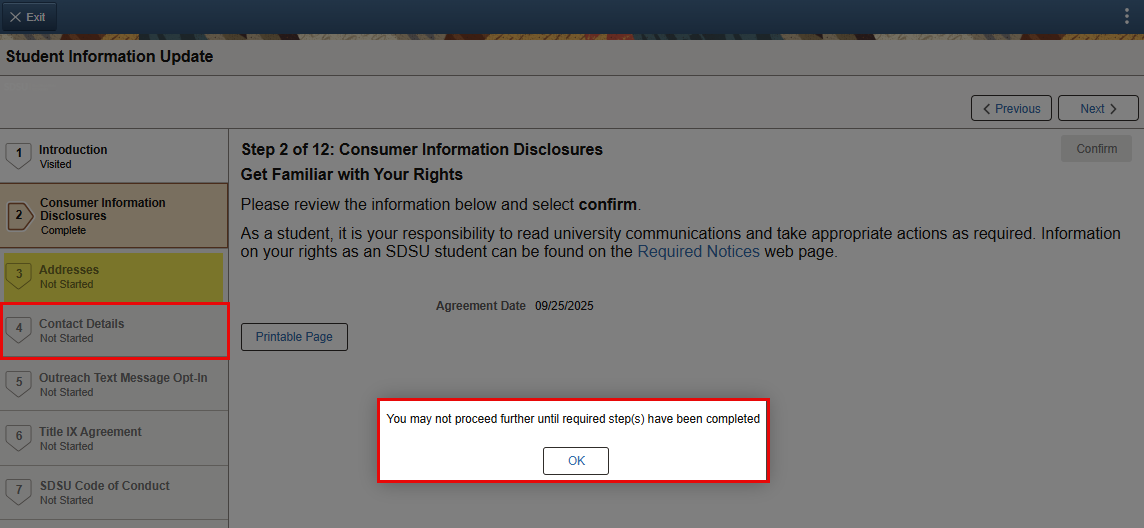
You will be directed to the Student Information Update page. The left side menu shows all of the sections you will need to complete. You will not be able to skip over any selections, as they must be completed in order to complete the task; you will receive a message informing you that you cannot proceed further without completing the previous section.
The Exit button is in the top left corner of the page above the side menu and will close the Student Information Update page. The Next button is on the top right of the page and will take you to the next section of the form. As you navigate through the screens, you may return to the prior screen at any time by selecting Previous in the top menu bar.
Please see the menu below for instructions on how to complete all of the sections of the Student Information Update.Student Information Update Sections
The Introduction page provides an overview of the Student Information Update task.
 Open the image full screen.
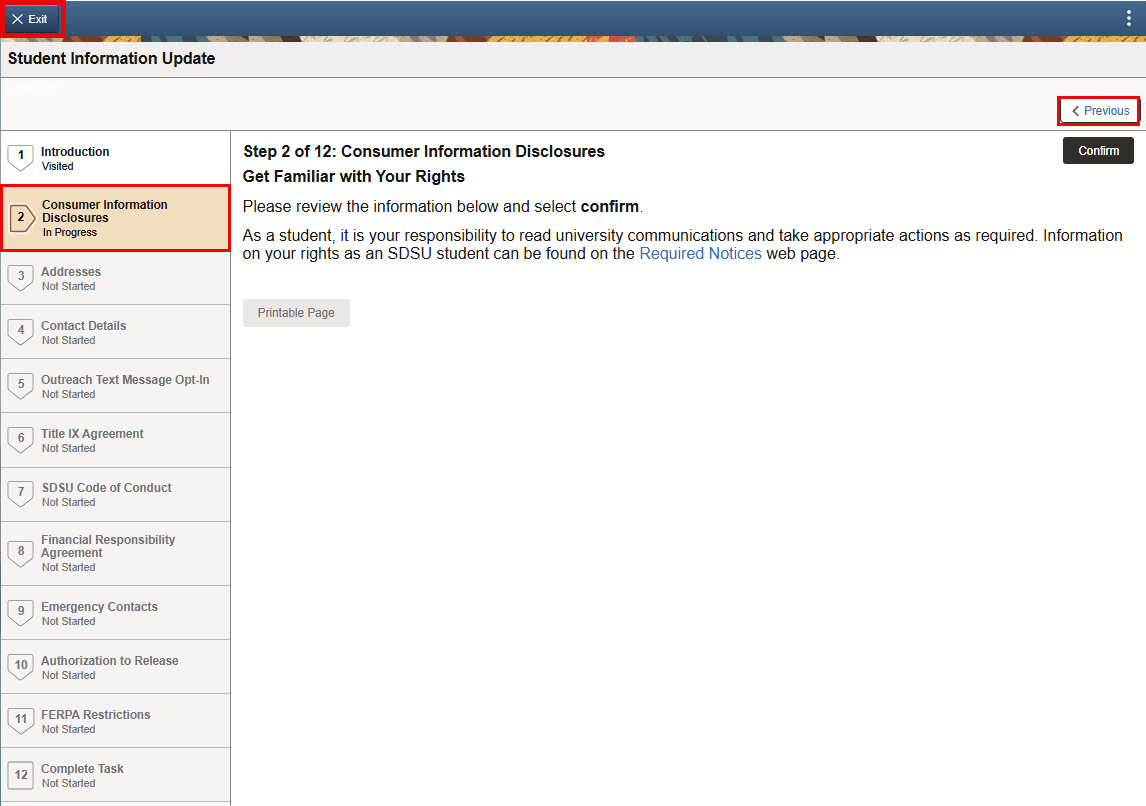
The Consumer Information Disclosures page provides information of reagrding your rights as a student. As a student, it is your responsibility to read university communications and take appropriate actions as required. Detailed information is available in the Required Notices web page.
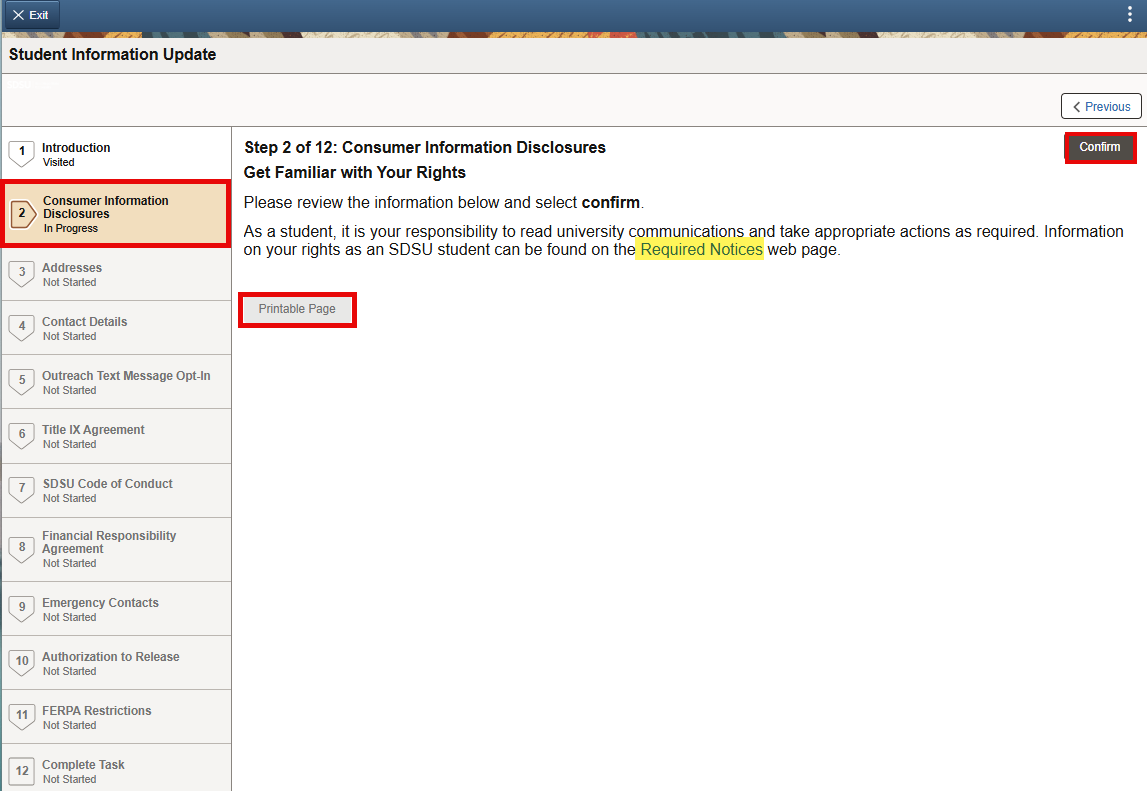
Select the Confirm button and the page will update with the Agreement Date. Select the Next button to proceed. A printable page is also available for your records.The Addresses page allows you to select up to 5 address types to have on file in my.SDSU: Home, Mailing, Permanent, Diploma, and Local.
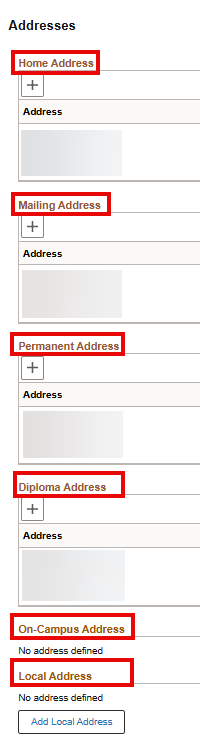 Note: On-Campus Address cannot be edited.Add a new address:
•Select the blue box below the address type. For example, if you do not currently have a Home Address in my.SDSU, select Add Home Address.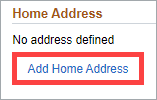
Edit an existing address:
•Select the box around the address you would like to edit. For example, if your Mailing Address is missing an apartment number, you can select the existing address to edit it.
 Open the image full screen.
Update an address:
•Select the + sign in directly under the address type, such as Permanent Address, and above the existing address. Once an address has been updated, the newest address will show as Current. Previous addresses will display with the revision date for reference purposes.
 Open the image full screen.
Save address information:
•Fill in the information on the Add Address or Edit Address pop-up form and select the blue Save button in the upper right corner.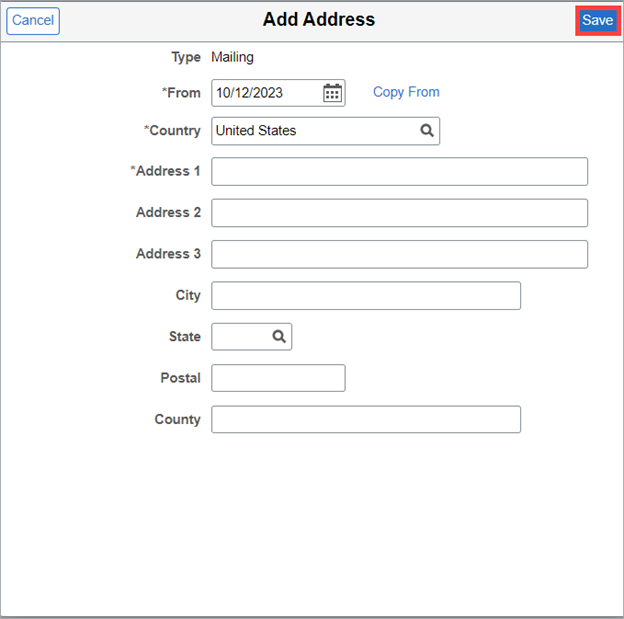
All updates can be viewed on the main Addresses page.
Once all of the address information is accurate, select the blue Confirm button at the top right to save the changes and the Next button to proceed.The Contact Details page allows you to update or add phone numbers and emails. Please double check for typos.
Update your personal email address:
1. In the Email section, select the box around your Home email address.
 Open the image full screen.
2. Another window will open for you to complete your update. After making any changes, select Save to return to the main Contact Details screen.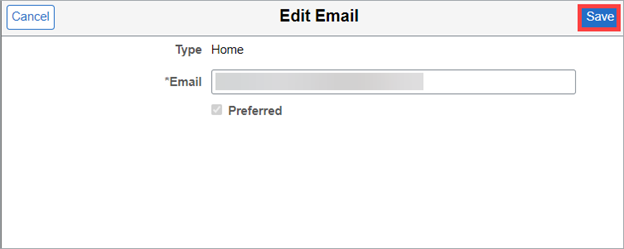
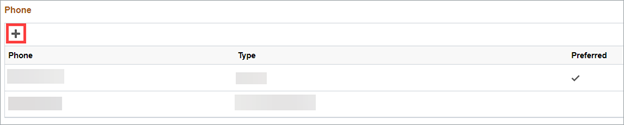
Note: Your on-campus email address cannot be updated or changed. Your home email address will be marked as your preferred email. However, as long as you are a student, SDSU will use your on-campus email for official communications. It is your responsibility to check your on-campus email address regularly.Add a phone number:
•Select the + sign directly under the Phone title and above the existing phone number displayed.
 Open the image full screen.
•Fill in the information on the pop-up form and select Save to return to the main Contact Details section.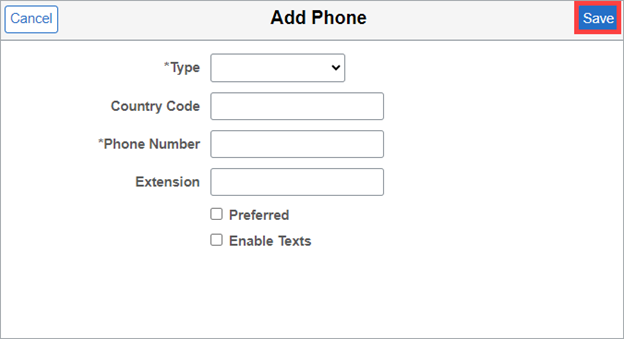
Update or change a phone number:
•Select the box around the phone number you would like to update. Another window will open for you to complete your update.Any updates or additions can be viewed on the main Contact Details page. Once the information looks correct, select the blue Confirm button at the top right to save the changes and the Next button to proceed.
The Outreach Text Message Opt-In page allows you to accept or decline outreach messages from SDSU.
If you would like to receive outreach messages from SDSU via text on your mobile phone, you will need to Opt-In by selecting the blue Accept button on this screen. Messaging rates may apply from your phone carrier.
If you do not wish to Opt-In, select the white Decline button.
 Open the image full screen.
Once accepted or declined, the page will update with your Agreement Date and Agreement Status. When you are happy with your selection, select the Next button to proceed.
The Title IX Agreement is an acknowledgement that you have read the information relating to options and resources for students who experience sexual violence. The agreement contains links to student resources. For detailed information about your rights and options or to connect with your Title IX Coordinator, please visit SDSU’S Title IX web site.
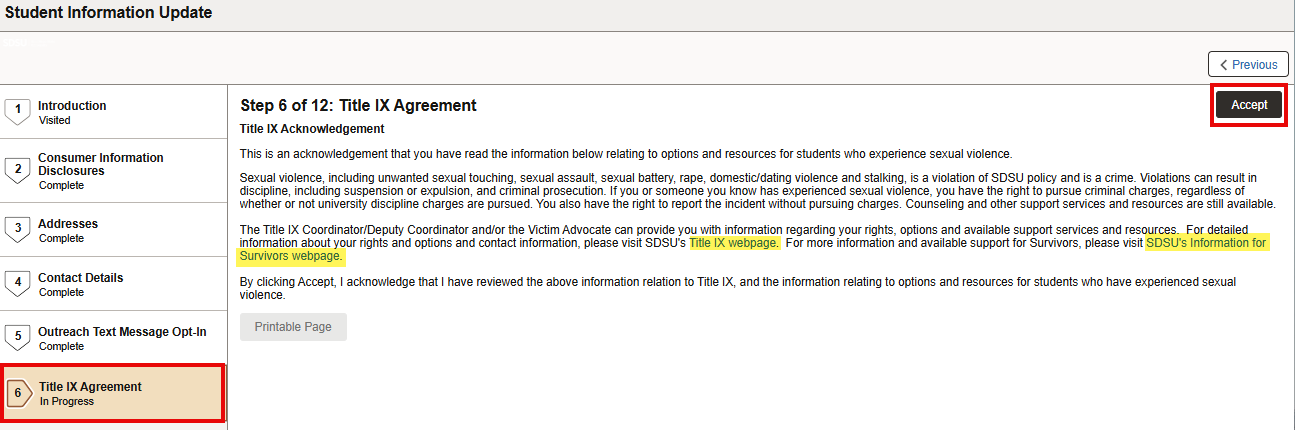
Select the Accept button and the page will update with the Agreement Date. Select the Next button to proceed.As a condition of enrollment at San Diego State University, you must acknowledge the SDSU Code of Conduct.

After you read the text, select the acknowledgement button located at the top right corner of the page, and the page will update with an Agreement Date. Select the Next button to proceed.The Financial Responsibility Agreement is an acceptance of the various financial responsibitlities a student agrees to with the University.
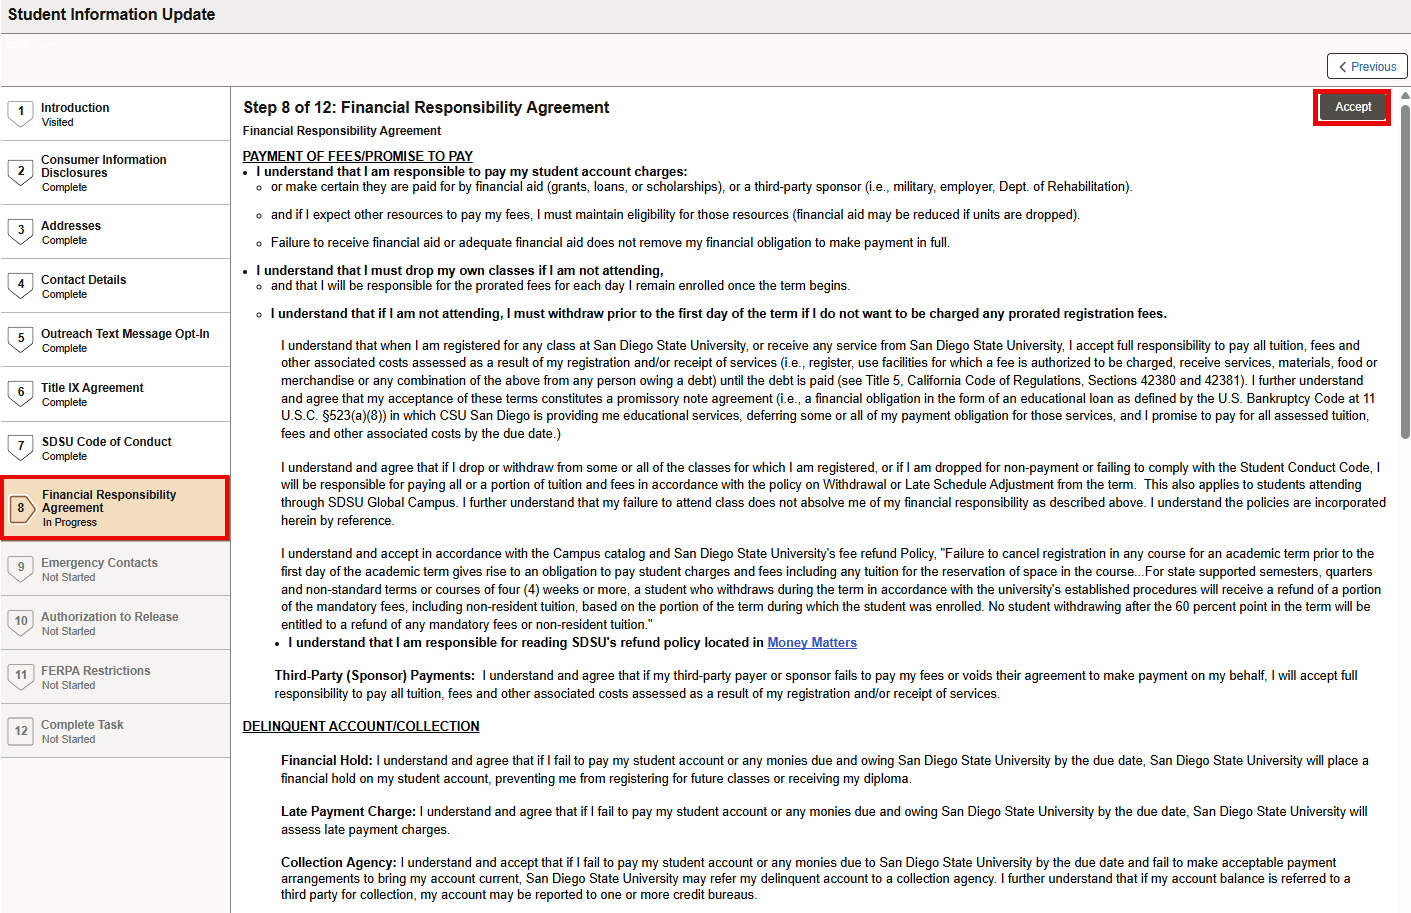
After you read the agreement, click the Accept button on the right hand corner of the screen and the page will update with an Agreement Date. Select the Next button to proceed.An Emergency Contact is an individual person that you would like SDSU to contact in the event of an emergency.
Add an initial Emergency Contact:
•Select the Add Contact button.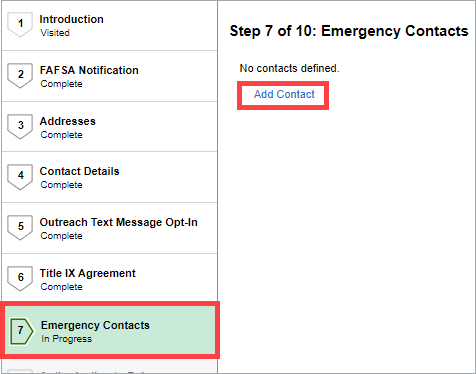
•Complete the information in the pop-up window and select Save. To add a second phone number for the selected Emergency Contact, select Add Phone.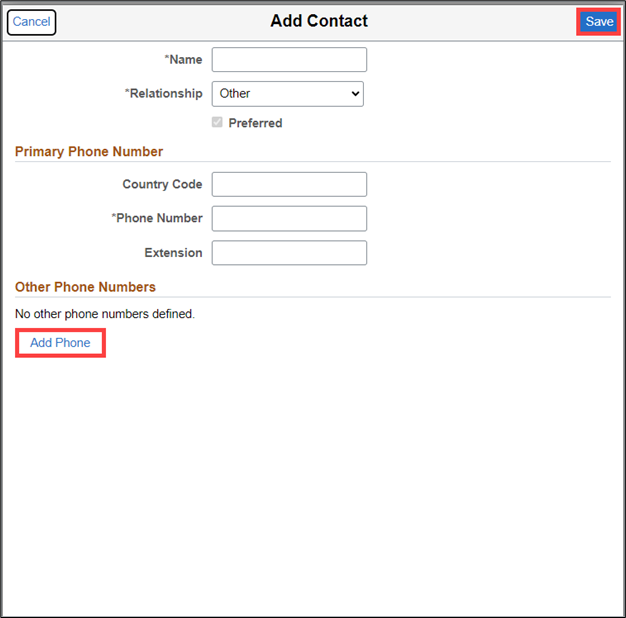
Edit the information for an existing Emergency Contact:
•Select the arrow beside the name that you want to edit and update as needed.
Add a second Emergency Contact:
•Select the + sign on the top of the page below Emergency Contacts and complete the Add Contact form (pictured above).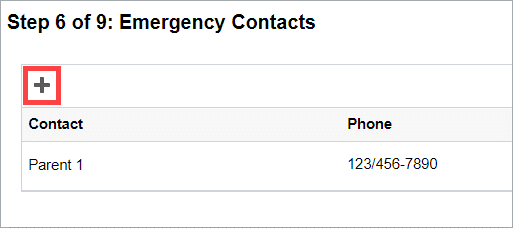
Any updates or additions can be viewed on the main Emergency Contacts page. Once the information looks correct, select the blue Confirm button at the top right to save the changes and the Next button to proceed.Your student records, maintained by San Diego State University, are protected under the Family Educational Rights and Privacy Act (FERPA). FERPA gives you the ability to release your education records to third parties, such as a parent, guardian, spouse, etc.
Completing the Authorization to Release form allows you to authorize the Office of Admissions, the Office of Housing Administration, the Office of the Registrar, and/or the Cal Coast Student Financial Center to share your records with your third-party designee(s). Granting access to one office does not grant access to the other offices. This release only covers documents noted in the section below and you can make changes at any time.
This form can be left blank if you do not wish to give authorization.
Allow an additional person to access your student records:
•Enter the first name and last name of the additional person you are allowing to access your student records.
•Create a four-digit access code to share with the additional person so they can access your data.
•Enter an expiration date and which department(s) the records are being released from. A maximum of 1 year can be selected. If you wish to continue access after the expiration date, you will have to submit another Authorization at a future date.
•Select the Department and Records to Release by selecting the search icon and then selecting the corresponding department/record.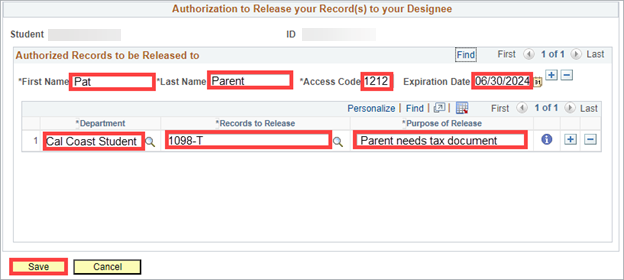
•Add additional people by selecting the plus + icon next to Expiration Date. Delete permissions assigned by selecting the minus - icon.
•Add additional departments and permissions by selecting the plus + icon next to Purpose of Release. Delete permissions assigned by selecting the minus - icon.
Select the yellow Save button at the bottom right to save your changes. Then, select the Next button to proceed to the next item.
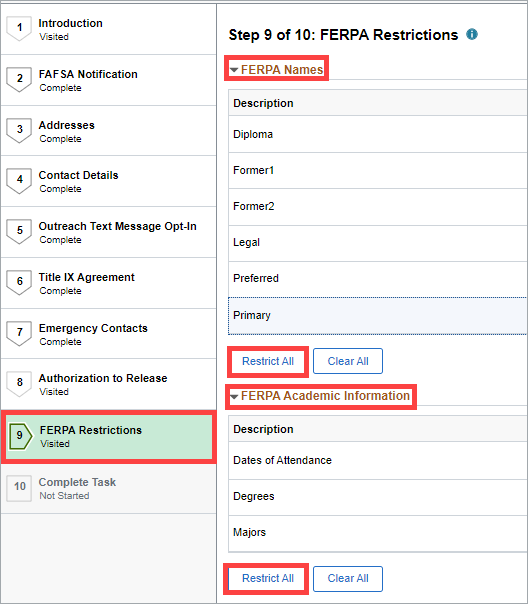
Under the Family Educational Rights and Privacy Act (FERPA), you have the right to restrict the release of certain categories of directory information.
Students who wish to restrict directory information should realize that their names will not appear in the commencement program and other university publications. Further, employers, credit card companies, loan agencies, scholarship committees and the like will be denied any of the student's directory information and will be informed that there is no information available about the student's attendance at San Diego State University.
•To proceed with restricting the release of directory information, select the drop down arrow next to either FERPA Names or FERPA Academic Information to choose individual items.
•To restrict information, check Restrict All for each category or select an individual row and then select the Restricted checkbox.
•Any FERPA Names or FERPA Academic Information items with a checkmark ✔ next to them are Restricted. If you have any checkmarks under the Restrictions column, your information will not be printed in the commencement program.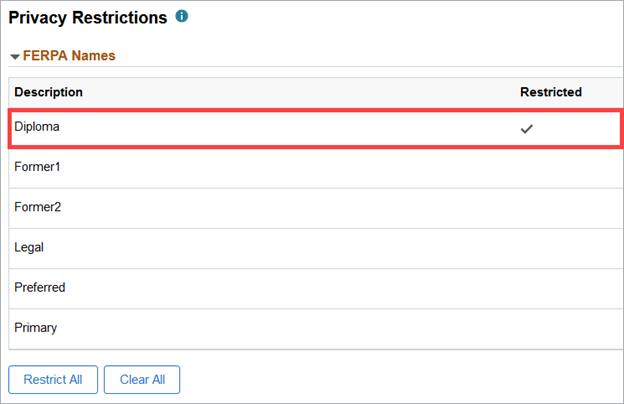
•To allow information in a certain category to be released, select a row and then uncheck the Restricted checkbox. For more information, please refer to the Removing FERPA Confidentiality Privacy Restrictions guide.
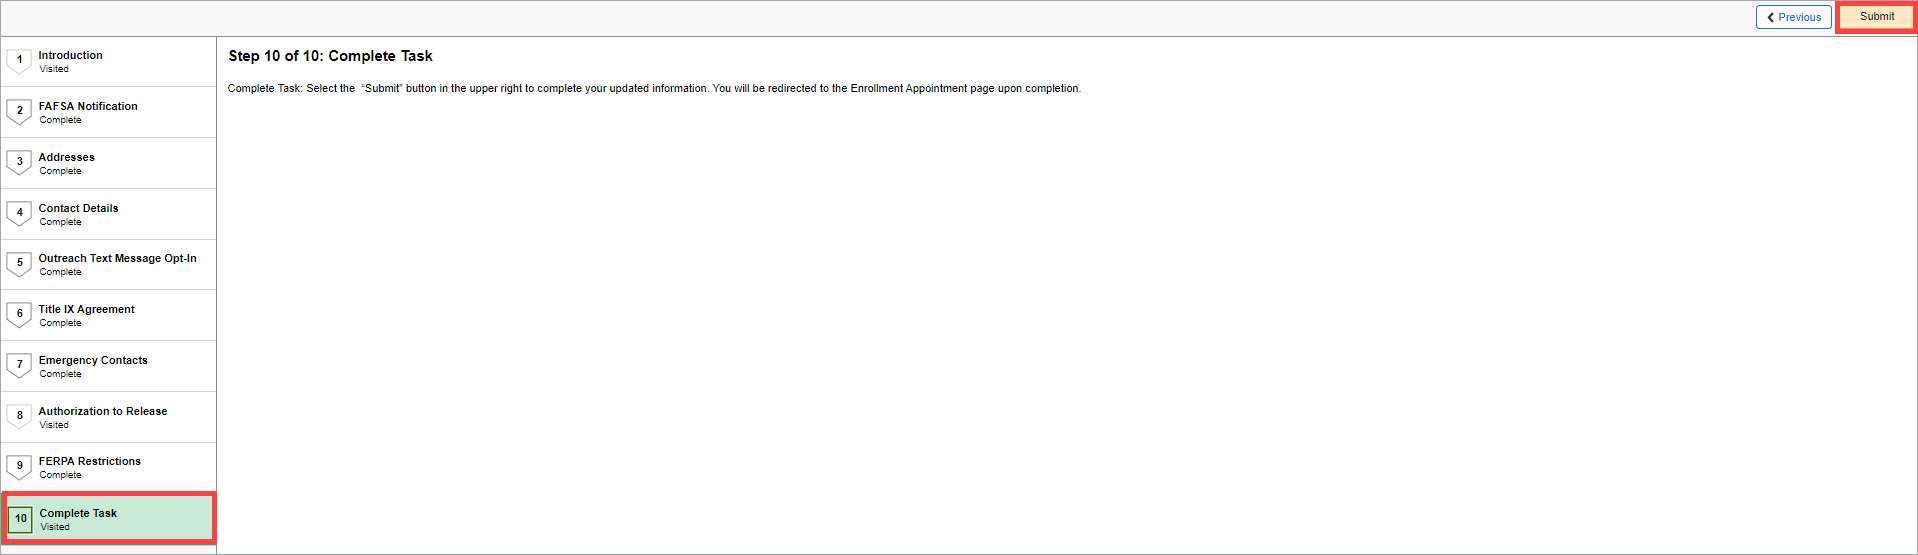
Once the information has been restricted or released as you like, select the blue Confirm button at the top right and the Next button to proceed.Select Submit to complete the Student Information Update Task. You will be redirected to the Enrollment Appointment page to view your assigned registration enrollment appointment for this term.
 Open the image full screen.